Quantcast
Channel: DIY Audio Electronics from Zynsonix.com
Viewing all 105 articles
Browse latest View live

Modding the Atari Lynx Portable with McWill Screen, New Caps

$
0
0

The Atari Lynx is a relatively obscure system that was released during the burst of hand-held gaming systems between 1989 and 1991. This included the Lynx, as well as Nintendo’s Game Boy, Sega’s Game Gear, and NEC’s TurboExpress. While the Game Boy was the value champ and the TurboExpress was the top performer for kids whose parents belonged to country clubs, the Lynx and Game Gear were both middle players which had similar orientations, screens and gaming performance.

An old double-page magazine ad of the Atari Lynx

While they were a blast 30 years ago, by today’s standards, the backlit screens on these middle performers are dull and faded looking and not terribly efficient with batteries. Fortunately for fans of retro games, McWill offers a replacement screen mod for both systems which gives each unit a crisp and bright display. This is very helpful for those of use who grew up with these systems and who’s eyes are getting a little older.

A photo of the original LCD from Gametech.us

What else is getting older is the capacitors and power components in these units. Electrolytic capacitors from this time frame are not known for reliability and are likely ready to give up the ghost at a moment’s notice, bursting and oozing out onto the PCB and making restorations more involved. In addition, the Lynx has some silicon parts that handle the 9V to 5V regulation that need to be replaced too, otherwise if they fail, the motherboard can get fed 9V and that is enough to take it out of commission. Fortunately, these parts are available and cheap to replace, even with nice quality Japanese caps like Nichicon.

What’s not cheap is the McWill mod, at $120 as of this writing, but if you’re a fan of these old systems it is totally worth it. Not only is it on the pricey side, but it takes some effort. You need to know how to handle SMD soldering (use tweezers, a fine point iron and lots of liquid flux). If you are not sure about soldering skills, you should not be handling these mods. There are several people out there that do the mod for what I consider to be very reasonable.

As an example, I’m pretty methodical when soldering, but to replace the caps, power-related parts, and wire up the screen and VGA out takes a solid 8 hours. Granted if I did it again, I could get it down to 4-5, but there are people replacing screens on eBay for $200 with the $120 McWill mod included, and another $60 or so to replace the caps. I’d call that a solid deal if you’re not inclined to handle it yourself.

I picked up the McWill Screen mod, a set of caps, and the power parts for about $130 from Console5. They host the instructions PDF as well. The two-page instructions on the McWill is decent but has a couple of head-scratchers that you’ll have to Google around to figure out. They could be better, but I’m sure this mod is a labor of love and McWill’s not getting rich from it… so just grin and bear it. 
Before getting started, I placed a paper towel over the screen and then covered the front of the unit with painters’ tape to protect it. It doesn’t stick much so it won’t leave residue, and it protects the unit from getting scratched while you work on it.

Using painters tape to protect the Lynx

To get the unit open, there are five screws that need to come out, two under each of the rubber grips on the back, and one inside the battery compartment. To get the rubber grips off, wedging a thin screwdriver underneath on one of the corners and gently rocking back and forth will help the adhesive give way. I’d recommend using foam or painters’ tape to protect where the screwdriver’s shaft touches the unit to avoid marring.

Screw locations to get the unit open

Removing the back cover reveals the circuit board and all the little capacitors you will have to replace. 

Atari Lynx interior

Capacitor locations

These are pretty easy to handle, aside from the one sitting in the middle of the metal shield. For that one, the copper shielding behind it must be partially removed so you have access to the solder joints underneath. Once that cap is replaced, the joints need to be covered with dielectric (electrical tape / Kapton tape, etc.) so the copper shield doesn’t short it out. For the rest of the caps, simply heating the joints on the bottom of the PCB while pulling on the cap on the top of the PCB releases them fairly easily, then a solder sucker can be used to clear the eyelets on the board. One trick is you should NOT cut the leads until you try and reseat the back cover to confirm there is clearance. Some of the caps may touch the case or the speaker so they have to be leaned one way or another.

Based on the directions provided for the McWill, several parts which handled the old LCD need to be removed. You'll notice these are mostly on the right of the photo below. 

Fresh new capacitors installed and non-vital parts removed.

The next objective is to replace the voltage regulator parts. This includes a Zener diode, MOSFET, two 3906 transistors and the power jack. The MOSFET is the largest part. I trimmed off the legs, then heated the metal backing behind the chip to get it to release. The existing jack is superglued down next to a teeny transformer, so be very careful when removing that glue not to damage it. The remaining parts are quite small and require SMD tools to install (tweezers, liquid flux, small solder tip, etc.). 

The voltage regulator parts are tiny, so be sure you're up for the task

Below is the unit getting wired up. I like to use 24 gauge silver-clad copper wire with PTFE sleeving. It's nice high quality stuff and is pretty is to route. When wiring, you have to ensure you are considering how the screen will be oriented in relation to the main PCB so the wires aren't cut too short or too long. 


Wiring up the VGA output

The VGA output installs where the brightness potentiometer used to be (you do need to dremel out some of the plastic so it will fit). It's a nice added feature that adds value to the McWill package. HDMI would be preferable, but that would add cost and complexity which may not be welcome for many modders. 

Wired up and ready to re-assemble


Once all that work is complete, you'll have yourself a beautifully performing Lynx system that will hopefully last another thirty years.


The big question now... is all this worth the hassle? There are a number of us that like to play games on original hardware because emulators introduce annoyances like slowdown, sprite flickering, crashing, etc. If you want to play Lynx games on original hardware, you have to replace the voltage regulation immediately or you'll be playing Russian roulette with a valuable piece of vintage gear, and really the capacitors all need to be replaced too. If you're already going to that effort, the McWill screen is a no-brainer given the improvements... just keep in mind that if you're not sure of your solder slinger skills, get someone else to handle it. 


The Fine Print: Please remember that building/modifying circuits can be dangerous to you and/or your surroundings and should only be performed by a certified technician. The owner of this blog and all associated parties can not / will not be held responsible if you attempt a build or modification posted above and cause physical harm to yourself and/or your surroundings. 


Vanatoo Transparent Zero Powered Mini Speakers Review

$
0
0

Speakers are often a conundrum for space-strapped audiophiles. Sure, often larger speakers sound better, but there are often constraints like room size, distance from the walls and other equipment, and plenty of other imaging concerns. If you’re not listening in a dedicated listening room, often these factors are less than ideal. Fortunately, there are some speakers out there that truly make the most of their minuscule footprint, filling the room with great sound without being too picky about placement.

The first time I heard the Vanatoo Transparent Zeros, I was at Capital Audio Fest. I walked into a room full of onlookers (or should they be “onlisteners”?) with sound effortlessly enveloping me. Then confusingly, I looked around for what is usually a tower of equipment flanked by a pair of tall speakers… only to find two minuscule trapezoid-shaped boxes at the front of the room. Right then I knew the Vanatoos were special.
The Zeros come with some sweet magnetic grills and isolation pads

Granted I have built a couple of small-form-factor full-range speakers in the past that do a nice job filling a small space and work well for near-field monitoring. One of which uses a 3” driver from GR Research, and one uses a 4” driver from Fostex. Both I like to augment with a small subwoofer to fill in the lower-end. The Vanatoos certainly do not need any low-end augmentation. The bass quantity is there in spades. This is thanks to a 4” passive radiator that complements the 4” woofer, moving quite a bit more air than just a single driver. In fact, the bass is actually a bit much for me (someone used to listening to headphones) so I simply turn the bass down on the Vanatoos and all is well.

The bass adjustment is not on the source equipment, the Transparent Zeros actually have a built-in equalizer. That’s not all, they have a built-in integrated 4-channel 48W class D amplifier, USB input with built-in DAC, wireless remote, Bluetooth (with aptX), and a subwoofer out if you’re a true basshead and NEED MOAR BASS. It also comes with a host of wires if you happened to not have any USB or analog cables sitting about. So, for $359 a pair, you get a lot for your money... truly a plug and play system where all you need is a phone or computer to get grooving. These speakers sound quite good in this price-range and fill the room better than anything I’ve heard at this price.

A look at the variety of features on the back of the unit

Being an audiophile and a relentless tweaker, I’ve done quite a bit of experimenting with placement and found the Zeros sound best in a certain configuration. Per the literature, you can place the speakers firing up or stood on their handle, firing forward. I found they sound notably more controlled with firmer bass firing upward, likely because more surface area is planted on whatever surface they are sitting on. I also like them placed on an IsoAcoustics Aperta stand, mounted on a wood plinth with the included foam pad sandwiched between the speaker and the wood. To increase the clarity of the treble, I recommend removing the magnetic speaker grills. These little tweaks may sound silly, but you'll quickly hear a difference. 

I haven't tried building any large gauge cables for them yet (or use an audio-grade Ethernet cable to connect the second speaker to the base speaker), but in time I'm sure I'll try it :) Placement, I believe, is far more important. 

A look at the handsome Zeros sans grills


I don't think the Zeros sound quite as controlled in this configuration,
but I encourage you to try it yourself.

Anything not to like? As mentioned, you’ll probably want to play with the EQ and potentially use a stand to get the sound to your liking. In my small listening space, the bass was a little overwhelming and overpowered the rest of the sound. I believe the standard settings are voiced a little more for the average user vs. the audiophile or enthusiast, which makes sense given the price. Turning down the bass and bumping up the treble results in a nice, balanced sound (to these ears), falling to the warm side thanks to a forgiving soft-dome tweeter. The typical caveat for Bluetooth applies: while it is perfectly implemented on the Zeros, it takes some of the life out of the music, just like every other device I’ve used Bluetooth with. It will be a while before I ditch the wires ;) Connecting is a breeze though and easier than most devices. I was also surprised at the quality of the built-in USB DAC, being quite clear when extracting hi-res music from my phone. 

If you are looking for an all-in-one sound solution for a small to medium-sized room and you're looking for good sound quality at a very reasonable cost, the Transparent Zeros are a great choice. Also, if you anticipate needing something portable that can be moved from room to room easily (or taken along for travel), the value gets even better. They are versatile, well made, and have carved themselves a nice niche in the market that was previously vacant.  


The Fine Print: DIYAudioBlog was provided the Vanatoo Transparent Zeros as a review sample, however this does not affect the integrity of this review. I actually use them frequently in my work-room while I build new stuff to blog about ;)  


Linear Tube Audio MicroZOTL MZ3 Headphone Amp

$
0
0
The Best Headphone Amp I Have Heard At Any Price

Like most of you, I’ve been doing this audio thing for a while. I’m privileged to be in the MD/DC/VA corridor so I’m able to attend meets and audio shows regularly and sample a lot of different equipment. Generally, at any show there’s plenty of gear that sounds very good, and there are a 2-3 special pieces of equipment that leave a strong, lasting impression. These are usually priced like a new car, but every now and then you find a performance outlier, something that’s disruptive in its price range and should frankly cost far more. One such performance outlier is the subject of this review.

About a year ago I attended Capital Audio Fest (goes by CAF for short) which has a small but ample headphone presence. There I saw Linear Tube Audio’s booth and wandered over. I was familiar with LTA’s MZ2 headphone amp based on David Berning’s ZOTL technology, having previously listened to it at a meet in its stand-alone state without the power supply upgrade. The unit’s visuals with transparent top harkened back to the original blue Berning headphone amplifier I listened to at a meet many moons ago (its Plexi side window presented the unique topology like a PC enthusiasts rig).

New at the booth for 2018 was a pre-production MicroZOTL pre-amplifier with a headphone output. I took a look and was a little dismayed it didn’t have a balanced output, but I sat down and had a listen anyway, plugging in a nearby MrSpeakers Aeon Flow (if you’re not familiar, it’s a very good value planar magnetic headphone under $1K) and choosing a song on Tidal. Everything sounded good and well until I heard the strumming of a guitar. It’s hard to describe how incredible it sounded, just crisp, natural and telegraphic, like the acoustic guitar was right there next to me and I needed to turn to my side to confirm it wasn’t. The acoustics of the song had more presence and detail than I was accustomed.

The gent running the booth, Josh Levi, let me know that MicroZOTL pre-amplifier was based on their new MZ3 headphone amp which would be out shortly, price TBA. Not being content with only a smattering of details, and knowing LTA is a local brand, I reached out to owner Mark Schneider and scheduled time for a visit to the LTA listening room/manufacturing area.

Mark has a calm and approachable demeanor and is a true engineer. I’m quite certain he has a complete virtual catalog of all the various audio parts available in his brain. We chatted at length on our preferences for various audio jacks, capacitors, resistors, what made an audible difference and what didn’t. Given the length of time I’ve been experimenting with various audio builds, I was almost perplexed that Mark had tried as many different items that he has.

Besides the parts, Mark was experimenting with myriad other design elements, picking up small but noteworthy improvements in sound. From expensive ceramic circuit boards to non-magnetic transformer covers, everything was there for a reason… sonic improvement. At this point I realized nothing here was getting phoned in, these devices were meticulously designed and likely engineered more carefully than most audio equipment on the market.

If this were the only thing going for LTA, they’d still be ahead of the pack, but the most unique thing about these amps is the technology. David Berning’s technology is completely unique. You will not find anything like it on the market. I’ve put together countless amps, solid state, tube (both with output transformers and OTL), hybrid, etc. The innards of MicroZOTL amplifiers look completely alien, with hand-wound magnet doughnuts and small towers of diodes residing above them flanked with wires on each side. I’ve read the white paper on how this works, but quite frankly it went above my head. Ultimately, for you and I the listener, we can say “who cares what’s going on inside, all I care about is the sound”. There’s certainly nothing wrong with that approach, but some niceties with this design are reduced heat, much longer tube life, and the units aren’t overly heavy from bulky output transformers. They also have a remarkably black background that you won’t hear in most tube amps.
Love the volume control display

Long story short, I helped out Mark with some marketing for several months while he finalized the MZ3 and a few months ago took one home. To say that the MZ3 is better than my highly modified Bottlehead Mainline is an incredible understatement. Not that I was dissatisfied with the Mainline, I found it to be a nice step up in terms of clarity from the Bottlehead S.E.X. and it held its own against other amps like the Torpedo, Budgie S.E., a high-voltage octal Aikido build and other various amps that have come through the listening room. The difference, however, is truly palpable. It’s very rare that I’ve changed a piece of gear and it’s just night-and-day better… like almost two decades ago when I shelved some $30 Sony headphones for the Sennheiser HD600s, or when I set aside a pair of HD650s for my first planar magnetic headphones, the Audeze LCD-2.
The MZ3 is not lacking in connectivity

Listening with my Audeze LCD-4, the MZ3 has a sound that is slightly more neutral than a typical tube amp, but it is still natural sounding. I personally would consider it neutral; others may consider it ever-so-slightly warm. It’s also, full, enveloping, and easy to get lost in the sound and just not think about anything else. Soundstage is precise and crisp. Every detail is there but not obtrusive or overly sharp. I believe what this amp has more than anything else is it just sounds so natural. I was starting to lose interest in headphone listening to speakers, however the MZ3 rekindled that joy so acutely that I often lose track of time playing track after track.

Bottom line, this is a phenomenal amp, truly the best headphone amp I have ever personally heard at any price. It is not the cheapest amp; however, the price is incredibly reasonable for the performance and all the detail that went into its creation. It’s not a balanced amp, but after hearing it, I honestly don’t care. I think building headphone amps can finally take a rest, as I don’t think I could ever make one that sounds this good. If you are a headphone enthusiast and can swing it, I highly recommend auditioning the MZ3. Even if you need to double your budget, save yourself some time and buy your forever amp. I know if for whatever reason I suddenly needed to rebuild my rig from the ground up, I would be at Mark’s office tomorrow with my credit card in hand.

PROS
  • Beautiful, neutral and engaging sound
  • Super black background
  • Attractive chassis
  • Cool, satisfying haptic-touch volume control
  • Includes a remote control
  • Has speaker outputs for high-efficiency speakers
  • Multiple inputs and pre-amp outputs
  • Price is very reasonable for performance level

CONS
  • Not a warm and syrupy tube amp if you are looking for that
  • Only comes in black

Note: I didn't get into some of the features of the amp as I'll only be using it as a headphone amp with its standard settings using the controls on the chassis... but others will be pleased to know there are three selectable inputs, a pre-amp output, speaker outputs for VERY efficient speakers (the output is about 1 watt), and a remote control that allows you to switch inputs, adjust balance, etc.

Setup:
Audeze LCD-4 Headphones w/Ballista Headphone Cable
PC w/Amazon Music HD Unlimited > Chord USB Cable > Schiit EITR > 110 Ohm Zynsonix Coax Cable > AudioNote DAC 2.1 > Zynsonix RCAs


Disclosure: The author provided marketing services for Linear Tube Audio from Sept 2018 to Mar 2019 in exchange for product credit. All views herein are the true opinion of the author and are not the result of any compensation or business arrangement.

SupaBoy SFC Super Nintendo Emulator Review

$
0
0
The SupaBoy SFC is one strange customer. We’ve seen a number of DIYers hack desktop videogame consoles to work on the go, but it’s typically for the novelty or the challenge. Hyperkin’s SupaBoy takes the familiar brightly colored Super Nintendo controller and adds about a pound of extras, including a 4.3” LCD screen, speakers, two controller ports, a cartridge slot, rechargeable battery and a variety of buttons. The additions aren’t quite svelte or seamless as the ergonomics are a little awkward, but it does have the look of a finished product.

The SupaBoy plays as the Pied Piper, whistling sweet tunes to nostalgic gamers (probably in their late 20s to early 40s) who still hold a place in their heart for the Super Nintendo and have held on to a few cartridges. Drawing you in are the insanely low price ($65 at various retailers as of this writing) and the promise of simple access to your SNES library without having to pull your console out of the closet and fiddle with the connectors.


Once you get the console in your hands, the first oddity is the cartridge sticking up above the unit when seated, quite unusual if you are used to the flush fitting Gameboy cartridges. Wrapping your hands around the console gives you an idea of its girth. It’s slightly unnatural feeling, but you can get used to it. Some may be bothered by the weight, but at just under a pound it’s not bad.

There’s a lot to like: the screen is nice and colorful, you can adjust the brightness, there’s a 4:3 mode, the battery is rechargeable and user-replaceable, it charges off of a standard 5V USB cable, the controls feel solid, the cartridge slot has a flip up dust protector, and there’s a headphone output. I was also surprised that given this is a hardware emulator, it was compatible with every game I tried.
One of the items that falls into the could-be-better territory includes the cartridge seating. I found I had to seat and reseat a number of cartridges to get them to start. Another bugger is the quality control. The first unit I received had a fingerprint smudge behind the screen. The second had a little bit of dust, which I can live with. Given those obvious flaws, there may be other issues lying inside, but I have not cracked the unit open to assess. On several reviews, I noticed some users suffered from having their saves deleted by the console.


Compared to a similar offering that plays 8-bit Nintendo games, the 8-Bit Boy, the SupaBoy SFC doesn’t have the same quality feel and screen crispness. The 8-Bit Boy runs $99, and includes a pair of controllers and AC Adapter, while the SupaBoy does not, so it’s a relatively fair comparison.
I think what Hyperkin could learn from the U.S. Market is that video game enthusiasts in the ~20-40 age bracket would likely spare more than $65 for a better product… or at least a little more for better QC. Given the popularity of the $185 AVS system, the $189 Analogue Super Nt / Sega Sg, and the upcoming Polymega, there’s a market for more premium gear that plays vintage games.

Ultimately, the SupaBoy SFC is a good product that makes sense to use in the house or take with you to a friend’s house with a couple of games but is a bit to large for most people to use portably. Due to the saving issues and limitations of emulation, it’s probably not a complete replacement for a SNES console for most people. At least for $65 it’s a great novelty and will let you hop into some of your favorite old games without much fuss.  

AudioQuest NightHawk Carbon Custom Headphone Cable

$
0
0

Unless you’ve been hiding under a rock, you’d know that AudioQuest is one of the most prolific audio cable manufacturers in the business. They also make some other nice stuff including the Dragonfly-series USB DACs and Niagara-series power conditioners. I personally really like their Jitterbug, an inexpensive little USB device that filters the power on your computer’s USB out.

Several years ago, Audioquest released their first foray into the burgeoning headphone market: The Nighthawk. The Nighthawk was priced competitively at $699 when it came out in 2015. It also made use of 3D printed "plastic-wood" cups, which was relatively cutting edge for the time. Since then, there’s been so much fierce competition in this price range that it would be hard to recommend it at its original price (these days I’d recommend the Audeze LCD-2 Classic or MrSpeakers/Dan Clark Audio AEON in this range). 

AudioQuest must have noticed the sea-change in the space, subsequently reducing the price to $599, then to $399, before discontinuing it at a price of $249. Somewhere during this 5-year stint the NightHawk Carbon came out with a revised driver and a closed-model, the NightOwl, came out. The interesting plastic-wood was also replaced with a less unique (and probably less polarizing) shimmering dark blue, not too far from the color-scheme of some Massdrop headphones like the Sennheiser HD-6XX (see 6XX mods here). 

Does the free-falling price-point insinuate that Audioquest's stint into headphones was poorly executed? Not at all, it's actually quite good for a company's first entry in the space. I personally find them a joy to listen to. Their signature is warm, slightly dark, very forgiving of poorly recorded music (think garage indie and alternative rock), and provide good bass quality and quantity. They’re well suited for movies and videogames in addition to music. They’re also very easy to drive with a 25-ohm impedance, and they’re light and comfortable. Some other niceties include a substantial travel case, two different pairs of earpads in the box (leather and velour), and a headphone cable with a microphone built in.

Oddly, the headphone cable is only four feet, which is a length typically reserved for headphones that are intended for mostly portable use. Given the NightHawk is semi-open and is not foldable, this is an odd choice, but fortunately solvable given the cable is user replaceable.

Given the Nighthawks are on the dark/warm side of things, a crisp-sounding cable will help bring the details out and give the headphone a more balanced sound. I chose the Xev, which is silver-clad copper in PTFE, rather than an all-copper or litz copper solution. Had the headphone been more detailed to start, a copper cable would work perfectly well.

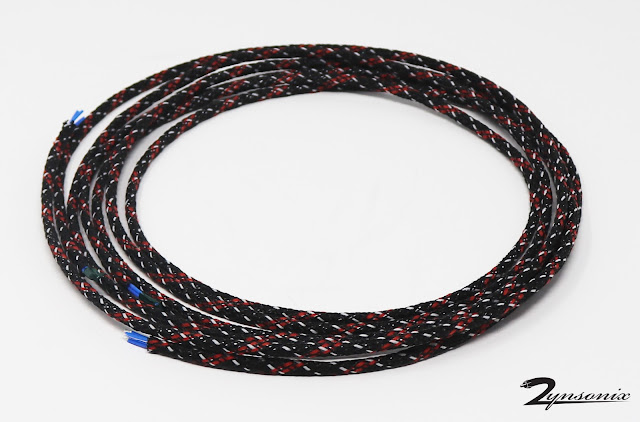
The Xev is a hand-braided litz of four isolated 24 gauge silver-clad copper wires sleeved in soft black nylon multifilament from TechFlex. 


The NightHawk makes use of 2.5mm TS connectors, where the sleeve is ground/negative, and the tip is signal/positive. They need to be slim fit or you'll run into issues. Eidolic makes a nice connector that fits the requirements as of this writing, and you can find solutions on AliExpress as well.


Below is a photo of the completed Xev cable, flexible and lightweight with plenty of length for those of us that need more than 4 feet. 


The sound is notably more balanced with more prominent treble, making it a definite keeper. 


If you are interested in the NightHawk Carbon, I'd suggest picking one up soon, as they are discontinued and AudioQuest has released a letter to distributors indicating they don't plan to offer any subsequent headphones, at least not in the immediate future. For the current price, build quality and extras, I could see this being a great first step into audiophile headphones, although one should also check out the Sennheiser/Massdrop HD-6XX, it's a hard value to beat.

To order a custom cable for the NightHawk, NightHawk Carbon, NightOwl, or many other headphones, please visit Zynsonix.com today.


Dynaco PAS Full Function RCA Jack Kit from Dynakit Parts

$
0
0

Likely the most popular tube amps in existence, Dynaco has many fans both young and old. Given how well they have stood the test of time, I hope they continue to be sought after for many decades to come. There are a number of companies offering kits resembling the originals with modern bits and pieces, but if you want to build or restore a Dynaco as close to the spirit of the original as possible, Dynakit Parts offerings are a great choice. 

Dynakit Parts is a company based in Clifton, New Jersey and has an impressive selection of reproductions of all the most popular Dynaco vacuum tube products. The kits are about as close to the originals as you can get, from the can capacitor to the screw-down terminal strips but have the benefit of using freshly made transformers and other modern parts.

If you are familiar with the older Dynakits from the 60s, you will remember they featured RCA inputs that are a little different than what we typically see today. On the pre-amps and integrated amps, they were spaced very close to one another and it is hard to find RCA cables that fit them now-a-days, not to mention middling quality (though good for the time).

There have been several attempts to reproduce the RCA board on the PAS using higher quality materials, however because of the spacing, not all the RCAs were able to fit in these offerings. Now that we're in 2020 that is not the case. Dynakit Parts has created a very nice-looking solution for those of you looking to feature all the inputs of the original while also providing a high-quality solution. Best of all, you do not have to cut or modify the existing chassis in any way, the kit fits like a glove. 


Above you'll see the items that are included in the kit. You get the handsome brown polyimide board with integrated grounding scheme, nine pair of gold RCAs, two pair of half-watt resistors, a bag of hardware, some detailed instructions, and a nice decal to identify the connections. The cost is a very reasonable $75, especially considering how many gold-plated RCAs are included. Last I checked they run about $6 a pair at PartsExpress, so you can do the math.

Something else that $75 bucks buys you is you don't have to wire up all the ground connections. Just tightening on the RCAs makes electrical connection with the integrated grounding. The image below gives you a better look at the traces.


So what do you have to do to get this puppy ready for install? Simply populate the RCAs onto the board and lightly tighten with a socket tool of your choice. Next you add the resistors and solder in place, and viola! you are done. So simple you can knock it out in 5-10 minutes. You'd then install on your PAS chassis using the provided hardware, or if you prefer a permanent install you can use pop-rivets to fasten the board in place.


Here is the other side of the board when completed.


So what's the verdict? If you are looking for an RCA board that features all the connectivity of the original PAS, this is a no-brainer. It's well made, easy to use and the gold RCAs look like they'll withstand the test of time. You could make a similar board yourself by drilling out a FR4 board, but you'd end up paying the same or more and it probably wouldn't look as nice. 

Now, if you're not a purist and don't need every connection available for the PAS, Dynakit Parts makes a nice kit with a couple less RCAs for a very reasonable $50 (as of this writing). 

If you're interested in the PAS RCA board or other Dynaco-related items, whether building a kit or performing a restoration, Dynakit Parts should be on your short-list. I've ordered quite a few things from Kevin over the years and everything has been superlative.

Hope you enjoyed the write-up. For more PAS related entertainment, you can check out this restoration I did several years ago.


Review disclosure: Dynakit Parts provided a reviewer's sample of the PAS RCA Board to DIYAudioBlog for an honest review. 

Balanced XLR Switchbox - Audio Design HAS-3LB

$
0
0
When it comes to passive balanced switchboxes, there aren't a whole lot of off-the-shelf options out there. It's not uncommon to just build them from scratch with a nice switch and point-to-point wiring as they're not terribly complicated.

I recently learned of a Japanese audio company called Audio Design that offers a simple but solid 3 in, 1 out balanced switchbox. The outside is a straight-forward design with a dark blue and silver aluminum box with a brushed aluminum front panel. The only control is the single selector knob up front to switch between the 3 outputs. What counts though is the inside, where there is a high-quality Seiden selector switch, some high-quality Neutric XLR jacks, and some thick copper wire... which appears to be 18 or 20 gauge. 


Balanced XLR Switchbox - Audio Design HAS-3LB

Balanced XLR Switchbox - Audio Design HAS-3LB


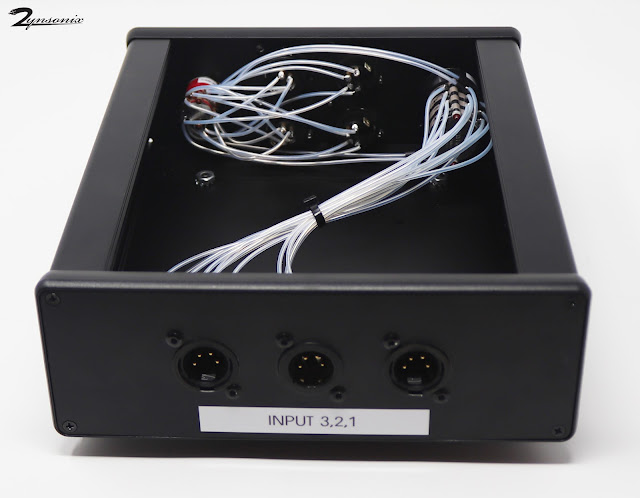
One of my clients owns the unit, and wanted to take it to the next level. The Seiden switch is already top-notch, could stay, but we'd replace the copper wire with solder core silver wire in Teflon tubing, the XLRs with the shiny and beautiful Cardas XLRs, and the generic plastic feet with EAR isodamp feet. 

I will say in advance, if you will be using the Cardas CM F and CM M XLRs, you better have a solder pot. The rhodium plating is not terribly interested in taking on solder so the areas where the wires connect need to be submerged in very hot solder for 10-15 seconds before they will be responsive. I personally use an American Beauty MP-9 solder pot for small jobs like this. I turn it on to the highest temp and let it warm for an hour before using. Kester low dross solder works well. 

Once all the Cardas XLRs had been prepped, the old Neutrik XLRs were removed from the rear panel and replaced. They are the same DIN dimensions, so no need to change the hole sizes or shapes. Note that the Cardas units have pins can comply to some extent thanks to a soft material surrounding them. I don't know if this was done for vibration damping or maybe the tolerances aren't super tight, but just an observation. 

The 24 gauge solid silver is then hand-sleeved in Teflon tubing and attached to each terminal. One should note to not make the paths too short or tight, as this will pull on the decks of the Seiden switch and cause there to be less surface area for the gold plated contacts to press upon. I chose to add heatshrink tubing over the solder contacts as silver will oxidize over time. The oxidation is still conductive, but it doesn't look as nice. Also it keeps the joints secure when shipping. 

 
Balanced XLR Switchbox - Audio Design HAS-3LB

Balanced XLR Switchbox - Audio Design HAS-3LB

Balanced XLR Switchbox - Audio Design HAS-3LB

Balanced XLR Switchbox - Audio Design HAS-3LB


The feet on the unit are attached with screws into threaded holes. There are no nuts or lock washers to worry about, so switching them is quick and painless. 

Whether modded or not, I think the Audio Design HAS-3LB is a very solid unit with no real shortcomings other than a slightly vanilla design. Should you wish to extract every bit of performance out of a stock unit, reach out to zynsonix.com for pricing information. 


Disclosure: Please remember that building/modifying circuits can be dangerous to you and/or your surroundings and should only be performed by a certified technician. The owner of this blog and all associated parties can not / will not be held responsible if you attempt a build or modification posted above and cause physical harm to yourself or your surroundings. 

The Retro Evercade Console is Here!

$
0
0

I've been waiting for the Evercade for quite a while and it's FINALLY here! 

It's pretty darn close to what I expected. The Evercade is a value-oriented product, so there are a number of compromises necessary to hit that low-cost sweet-spot. What really matters though is if it scratches that nostalgic itch and does a decent job of presenting the games, especially to those who may have never played them before. Get a low-down below of where Evercade really hits the mark and where it falls a little short:


Evercade Console
The Evercade console in white


What's great:

  • Huge selection of cartridges right out the door (10 available, 4 coming in Q3)
  • The console has a decent weight to it and the build quality is solid. There’s no quality concerns like with generic consoles from China like the SupaBoy (e.g. hair or dirt behind screen, smudges in finish, etc.)
  • The buttons have a great feel and response. The response similar to an Xbox controller, which is high praise.
  • The L+R buttons have a little less weight but make a satisfying clicky sound
  • The cartridges are a good size, maybe around the size of a Game Gear game (not tiny and easy to lose like the Switch)
  • Easy-to-access menu during gameplay
  • Nice looking, quality boxes for the cartridges and color manuals
  • Rechargeable battery
  • HDMI output
  • Low priced games and system. The system is about $100 with three cartridges, and the cartridges are $20 each. The system with all ten games is $200.

cartridge case

evercade cartridge case
Love the cartridge cases!

What could be better:

  • Cartridge fit is fairly tight… not on the contacts, but the left and right sides are lacking adequate clearance.
  • D-pad feels a little mushy, about what you’d expect from a 3rdparty value controller
  • Screen angle viewing isn’t great, but you’re going to be head on playing this thing so not a big deal
  • Screen could be a little larger
  • There seems to be only one save state per cartridge, vs. one per game
  • Sound quality isn’t the greatest. Granted these are 8 and 16 bit tunes, but they can still sound better with a little more wattage and a larger driver.
  • A number of the games are two-player, but I don’t think there’s a way to link up two of these puppies.


Evercade Console Back
That cartridge fit is tight!


Overall I think the Evercade is a really nice gesture to the retro gaming community. It’s a solid product with a price-point that’s accessible to many and already has great support from developers. The whole premise reminds me a bit of the NEO GEO X Gold, which was a nostalgic system released mostly for collectors where games were sold separately via cartridge. While I love SNK and the Neo Geo, I think the Evercade has more going for it than the X Gold with access to a variety of publishers. 

The real litmus test is in the games, and Evercade already has 10 titles available at launch (very impressive) and 4 more which will be releasing in Q3. Not only are there classic games, but new titles like Xeno Crisis and Tanglewood are being released. I’d really like to see it succeed so we can have even more newly released games and more classic collections to check out. I think the unit’s success in the market will be dependent on gaining more buy-in from devs so there are more carts available to consumers.


Storage Case
The storage case is a nice option


What could Evercade do to make a very solid release even better?

  • Allow a save state for each game and enable two player via a firmware update.
  • Offer a premium stand-alone console later down the line that addresses the compromises (screen, d-pad, speakers, maybe include a bigger battery) and sell for $199-$249. Collectors aren’t as price sensitive as normal consumers.


Currently available cartridges

  • Atari Collection 1 (with 20 games)
  • Namco Museum 1 (with 11 games)
  • Data East Collection 1 (with 10 games)
  • Interplay Collection 1 (with 6 games) 
  • Atari Collection 2 (with 20 games)
  • Namco Museum 2 (with 11 games)
  • Interplay Collection 2 (with 6 games)
  • Mega Cat Studios Collection 1 (with 10 games)
  • Piko Interactive Collection 1 (with 20 games)
  • Technos Collection 1 (with 8 games)


Removable Balanced Cable Mod for Beyerdynamic DT-1770 Headphones

$
0
0
I'm personally digging the newer, more upscale DT-1770 and DT-1990 from Beyerdynamic. The sound is more balanced and not quite as peaky in the upper midrange. The DT770, 880 and 990 are still incredible values though, and I'd recommend them to anyone looking to get into headphones. 

There's one glaring omission that Beyer could have done better with 1770 and 1990, and that's not using a 4-pin XLR with isolated grounds so the headphones could be run with balanced amps. For a headphone costing nearly $600 and given how little it would cost to implement is a strange business decision. Drop has actually released a version of the 1770 called the DT-177X which uses a 4 pin XLR, so I encourage anyone considering the DT-1770 to get that instead. 


3 pin XLR
3-pin XLR? That's no good!


Fortunately for Beyer fans, the existing units can be modified for balanced amplifiers. This involves removing the 3-pin XLR and much of the existing wiring and isn't very difficult. 

Below you'll see the offending 3-pin XLR which needs to be replaced. To open up the headphones, first the earpads are removed, then pry off the retaining ring using an envelope opener or similar tool. 

Beyerdynamic DT-1770 balanced cable mod 2


Under the retaining ring are the drivers. If you look carefully, there is a little indent on the outer edge of each. Using a small flathead screwdriver, you can apply some pressure to pry up the driver frame and remove it from the cups. This should all be done carefully as to not damage the drivers or the fabric on the driver frame. 

Beyerdynamic DT-1770 balanced cable mod 3


The drivers will often have a number on them. This is likely for matching purposes at the factory. In addition they will have a red dot near one of the wires. This tells you which side is positive. The wires can be trimmed and the drivers removed. Next the headband has to come off to replace the wire between the cups. There are a couple of screws to remove on the plastic brackets and you can then open up the headband and remove the wire. 


Beyerdynamic DT-1770 balanced cable mod 4


Other items that need to come off are the 3-pin mini XLR and the little strain relief pieces. The mini XLR has a plastic ring that screws it in place. There's a little bit of adhesive but it's not difficult to get off. The strain relieve pieces have a metal retaining piece, remove that and pull them out of the cup. They will need to be cleared out inside with a drill or dremel to provide clearance for thicker wire. 


Beyerdynamic DT-1770 balanced cable mod 5


Once everything is out, the replacement wire is soldered to a 4 pin mini XLR (Switchcraft or similar) and is fed through the strain relief pieces (orange circle below) through the headband and out the other side. The plastic pieces holding the headband in place have small indents where the wire enters and exits (red circle below). Inside, a zip tie should be placed right under the strain relief so the wire can't yank on the driver connection if it gets caught, and some light adhesive can be placed, then the metal retaining piece can be reinserted. 

Beyerdynamic DT-1770 balanced cable mod 6


Once everything is in place, you can insert the mini XLR back into the cavity on the bottom of the cup and screw on the stock plastic ring. Use a bit of adhesive or Loctite to ensure this does not come undone. 

Below you'll see the wire running to one of the headphone drivers. Beyerdynamic is now using small pins and a circuit board for ease of assembly. The pins are too small to solder to directly, so the wire should be soldered close to the board with a little bit of room for flexibility. Adhesive heatshrink should be used to prevent shorting. 

If you decide to try and remove the pin jacks and solder directly to the PCB, be very careful as you can damage the diaphragm wire which is quite thin. I personally do not recommend this as you'll likely find yourself buying a new set of drivers, but if you'd like to try it, godspeed. 
 

Beyerdynamic DT-1770 balanced cable mod 7


Once you have everything in place, you can reassemble the headphone. Below you'll see the modded DT1770 Pro (sans earpads, they were retained by the owner) and a spiffy new Zynsonix Ballista cable to go with them. 


Beyerdynamic DT-1770 balanced cable mod 8

Beyerdynamic DT-1770 balanced cable mod 9

Beyerdynamic DT-1770 balanced cable mod 10


I hope you enjoyed this brief tutorial and hope your mod goes well. If you'd prefer someone else have all the fun, please contact Zynsonix Audio who would be happy to handle it for you. 


Disclosure: Please remember that using a soldering iron and/or modifying headphones can be dangerous to you and/or your surroundings and should only be performed by a certified technician. The owner of this blog and all associated parties can not / will not be held responsible if you attempt a modification posted above and cause physical harm to yourself or your surroundings. 

Avantone MP1 Mixphones Balanced Headphone Cable Mod

$
0
0
Not a headphone commonly discussed on HeadFi, but certainly deserving of some merit, is the Avantone MP1 Mixphones. They are touted as “suitable for use in live sound, DJ, studio recording, mixing playback and listening applications“. The earpads and cups are quite large, isolating, and comfortable, and house sizable 50mm drivers inside. A client of mine, Steve, with a penchant for unusual looking electronics sent me one to work some magic on to see how we could improve it.


The headphone comes with a 3.5mm input on one side and a little switch on the other side with a rudimentary circuit for adjusting the sound to your liking. Steve had tried the unit with an aftermarket Zynsonix cable first, but wanted to run it balanced, and the only way to do so was to remove this little device, which I assumed would help with the clarity anyway.

The circuit, switch and the 3.5mm inlet would all be removed in favor of mini XLR connectors on each cup. Brainwaves XL Hybrid earpads would also replace the stock pads, which Steve mentioned were comfortable but tended to flatten out over time. I indeed read the same thing from other reviewers online so it appears to be a common issue.

The sound had nice body and warmth, but wasn’t super clear, and the resolution on the lower end of the spectrum was somewhat lacking. I knew some mass-loading damping material would help with this and tighten up the bottom end a bit. On the inside, there are more metal parts than you typically find inside a headphone as metal, while adding mass which can be a good thing, tends to weigh things down. Fortunately the headphone remains comfortable. Avantone lists the weight at 550 grams, however it didn’t feel that heavy on my head. I recall Audeze’s EL-8 titanium as the only headphone I found was heavy enough to be uncomfortable, although some have said the same thing about the new HEDD Audio HEDDPhones as well. Good weight distribution goes a long way in assisting with this.

I placed some damping material on the driver surround and the inside of the cup strategically. You don’t need too much to get the desired result. Once everything was put back together with the new balanced cable, circuit delete, damping material, and pads, the sound was notably more resolving and controlled in the lower-end especially. Note the damping placement below:

Damping material placement


Steve’s impressions:

Now, to the unmodified and your modification versions of the Avantone Pro MP1 headphones. Both have Brainwavz XL Round Hybrid earpads. The unbalanced version has a Trebuchet cable. The balanced version has a Ballista cable. They are both driven, not at the same time, from the headphone outputs on the front panel of the Soekris dac1541. Source is a Nuprime CDT-10, output set to 192kHz sample rate, AES/EBU connected to the DAC. Good results began after 15 hours of operation; my observations here are at the 25-hour mark.

As much as I liked the unbalanced version, the balanced version has more of the good stuff: crispness, bass extension, expansiveness, body, blacker background. Surprisingly, this results in a less dry and less analytical presentation than the unbalanced version. This balanced version is easier to listen to for longer sessions. I did try line level balanced output from the Soekris into an XDuoo TA-20 amplifier. [FYI, for this amplifier, balanced in and out is noise free. Any unbalanced, in and/or out, is too noisy for me.] This was not as good a combination. The Avantone headphones, probably because of their very low impedance [16 ohms] and very high sensitivity [113 dB] need the stability and the low noise of solid-state amplification. All in all, a worthwhile and satisfying result.


You can see some images below of the unit. Steve took some of the latter. I took far more images during the process however my Canon T7i decided it was time for a summer vacation and didn’t save the images to the memory card.


Avantone MP1 Mixphones Balanced Headphone Cable Mod


Avantone MP1 Mixphones Balanced Headphone Cable Mod


Anyway, hope you enjoyed this write up, and if you’d like an aftermarket cable or complete recable of the Avantones or other headphones please contact Zynsonix Audio. Thanks very much to Steve for generously sharing his thoughts and time as well!


Disclosure: Please remember that using a soldering iron and/or modifying headphones can be dangerous to you and/or your surroundings and should only be performed by a certified technician. The owner of this blog and all associated parties can not / will not be held responsible if you attempt a modification posted above and cause physical harm to yourself or your surroundings.


Pioneer SE-700 Vintage Headphone Cable Mod and Balancing

$
0
0

The Pioneer SE-700 were the company’s flagship headphones released back in 1974. The driver is an unusual piezo-electric type. I am personally not aware of any other headphone manufacturer that offered this type of driver, but feel free to share in the comments if you know of one. The SE-700, SE-500 and SE-300 all use a similar element. 

Pioneer SE--700 old advertisement

An old advert for the SE-700 touting their specs


I’d describe the sound as airy, crisp, and similar to an electrostat with a detail emphasis. Bass quantity is very low, which I believe is typical of this type of driver. The simple metal frame and gimbals look rather elegant, and the overall unit is pretty light. The way it rests on the head is slightly odd compared to modern headphones, but it’s still very usable.

The piezo-electric driver is a very thin piece of metal foil with a frame going around the perimeter, with the positive and negative connections at the bottom. It is covered with bright yellow foam resembling a dish sponge. It is also quite delicate, so even opening the headphone can damage the driver. The unit is sealed shut with rubber cement or a similar adhesive so it must be opened very slowly and carefully to access the inside. 


Pioneer SE--700 old manual

An image from the user's manual circa 1974


The wire connections for the driver are circled in red below:


Pioneer SE--700 inside earcup


If you’re looking to purchase one of these you can keep an eye out on Reverb, eBay or similar platforms. Price for a good example will generally be between $80 and $150. You’ll probably want to replace the wiring including the 3-meter cloth-covered cable, and the vinyl headband and ear pads which will likely be flaking.

My client Steve who sent me the headphones had already replaced the pads and requested the inner wiring be replaced. The existing wiring contacts had been twisted together and covered with heatshrink (see above image), which seemed like an odd manufacturing choice and not an ideal connection. Running single strands from the connection would sound better. You’ll note both sides of the headphone below after the cabling was replaced.


Pioneer SE--700 inside earcup cable mod

Pioneer SE--700 inside earcup cable mod

The headphone was reassembled using 3M double-sided tape so it can be more easily opened if needed. Steve will be crafting a calfskin headband for the unit as a replacement for the original vinyl headband, which I feel is the only visual let-down. It appears EricJ from HeadFi created an excellent tutorial back in 2007 on creating a replacement headband which you can find here. Below you'll see the refurbished/modded unit.  


I hope you enjoyed this post on one of the more interesting vintage headphones out there. If you have a headphone that needs a cable upgrade please be sure to visit Zynsonix.com


Disclosure: Please remember that using a soldering iron and/or modifying headphones can be dangerous to you and/or your surroundings and should only be performed by a certified technician. The owner of this blog and all associated parties can not / will not be held responsible if you attempt a modification posted above and cause physical harm to yourself or your surroundings. 

NEOGEO Arcade Stick Pro Seimitsu Joystick and Button Replacement Mod

$
0
0
If you're like me and previously purchased the SNK NEOGEO Mini back in 2018, you might have seen the Arcade Stick Pro and figured it is just another similar device. To some extent, you'd be right... this is an emulation system that houses a handful of popular SNK games that you can play on a modern HDMI TV. On the other hand, I'd argue that the ASP is a much better product for the typical fan who wants to play the device rather than collect it, so long as you have space to store the larger form factor. 


One, you'll notice right off the bat that the HDMI output is far better looking than the NEOGEO Mini with crisper edges vs. the slightly blurry NEOGEO Mini. The second is rather than having a novelty mini arcade unit, you get a very solid joystick instead with nice clicky movement, responsive buttons and some weight to it.

Opening the unit up, you can see that SNK did not take shortcuts when they designed the unit. There's a metal plate on the bottom to provide that much appreciated extra weight, a clean layout and plenty of reinforcing pillars that make the stick very solid and sturdy. As a bonus, SNK set up the interior so you could easily switch out the buttons and joystick for aftermarket options should you wish. 

Personally I'm not the type that can tell much difference between a Sanwa stick vs. a Seimitsu stick or any other arcade brand out there. I don't play competitively so any enhancement to my guiding a character around the screen would be minimal at best. That being said, I love to mod things and this seemed like a fun little project to kill a couple hours and would hopefully make an informative post. 

The first (and actually most time consuming) part of the mod is to remove all the little plastic bits and screws from the bottom of the unit. I'd advise you put them all in a zip-lock bag so you don't lose any.


Once you have all ten screws removed, you can separate the top from the bottom. Below you will see the stock unit with the included joystick with square gate. Highlighted in red are screw holes that SNK included purposefully so you can install an aftermarket joystick. 


Removing the buttons is very simple and straightforward. You put a little bit of pressure on the center of the metal tab connecting the wire to the button. This dislodges a small metal protrusion that holds the tab in place via the little gap on the button contact. You can then remove the metal tab and wire from the button. Do not force these off or it will damage the metal tabs and you will have to bend them back in place or replace them. With the wires out of the way, you can use a channel lock wrench to press against the two sides of each button at the same time to clear it through the opening.

Replacing the buttons is even simpler, just pop them in place and replace the connections to the corresponding buttons. If you forgot what color goes where, simply use the image above as a reference. I personally used the Seimitsu PS-14-K buttons from the bounceback series just because I liked the concept that the buttons bounce back quickly if you were playing something like King of the Monsters and needed to win a grapple or something. You'll notice in the image below all the buttons are lined up identically in orientation, this is just for neatness and not required. 


The joystick requires a little more effort, mostly because you probably won't be able to find a current replacement joystick with the quick-disconnect tabs. For the joystick to mount within the Arcade Pro Stick, you'll need the MS style mounting plate. This will run $3-4 depending on where you get it. The joystick I chose is the Seimitsu LS-58-01-CR-SS, which is the LS-58 (a popular mid-ground stick) with red hardware and a 5 pin wiring harness socket. If you are having trouble finding the stick you want, you can replace the spring to a different weight without much issue. Also with the Seimitsu units, you can change the gate on the back. I chose a circular gate (called an Octoplate) rather than the square one it came with. Better for dragon punches I assume...? 

Before you remove the joystick, set your multimeter to continuity and set the probes on each of the four pairs of metal tabs where the quick disconnects are. Move the joystick to see what orientation shorts each and makes a beep, write these down so that way you'll know what to solder where. 

To remove the stock joystick, you'll simply need to remove the 5 screws circled below:


The new joystick is going to be agnostic to its orientation so long as you solder the wiring the same way you noted above. Rather than the pair of disconnects, you have two big solder joints on each corner of the PCB. You can test these with your multimeter with the wiring harness in to see which color is which direction. The return is common (all the pairs share the return connection). 


Each wire can be soldered now, you can use the color guide in this picture if your 5 pin harness is facing the buttons. One drawback is that the bottom of the joystick has a plastic tube that interferes with this placement, so you'll need to trim it off with a cutting wheel or your tool of choice. Each wire should be covered with some adhesive heatshrink tubing and then the bundle zip-tied together. 

Note there are four black adhesive circles in the corners of the image below. They like to fall off while you are working, so make sure to put them back before reassembly. 


Once complete, you can screw the unit back together and replace the little plastic screw-hiders. Final photos coming soon. 


Zynsonix Headphone Cable Video Reviews from AB's Sound Advice

$
0
0

Here are a few video reviews of Zynsonix headphone cables from AB's Sound Advice AZ/AU. You get to enjoy a brief review and Ashley's nice New Zealand accent all at once. These videos are also a great way to check out the different sleeving options to see which you prefer. 


Ballista custom headphone cable for Denon headphones featuring denim remix sleeving and balanced 4 pin XLR


Ballista custom headphone cable for Sony MDR-Z7 headphones featuring soft black nylon sleeving and balanced 4 pin XLR


Ballista custom headphone cable for Klipsch HP-3 headphones featuring Viablue sleeving and balanced 4 pin XLR


Be sure to check out AB's Sound Advice Channel for more great reviews on audio gear. 


Headphone Switchbox in a Compact Chassis

$
0
0

A few years ago I made a headphone switchbox. It was popular enough that I added it for sale on Zynsonix. It uses a standard Hammond chassis which is made in Canada. There have been people looking for a more compact version. Unfortunately Hammond doesn't make a super compact extruded chassis from this line, however a fellow over at HeadFi, ScornDefeat, was able to find a smaller chassis that fits everything (just barely). I believe it's the same chassis as the Objective 2 headphone amp. The size is 3.15" x 5.25" x 1.37" / 80 x 134 x 35mm (LWH) and it comes in anodized black, silver, or blue. 

Rather than Electroswitch in the previous build, the similar 3 pole Lorin CK-1460 is used, and rather than the flashier Neutrik NMJ6HC-S with silver hexagon design, the plain black NMJ3HF-S is used. These are all about the same size so should be interchangeable. 

The knob is a 1/4" Kilo machined aluminum knob. I prefer the selector on the right as it's a little more natural to use the right hand to switch outputs. 

One oddity to note is the chassis that came from Amazon had tapered head silver screws and the chassis screw holes needed to be threaded (Hammond chassis comes pre-threaded). 


If you'd like to build one of these yourself, it shouldn't take longer than 2-3 hours. I recommend solid core 24 AWG wiring for headphone signal wiring inside of a chassis. 

If you'd like one of these built for you for your headphone switching needs, reach out to Zynsonix


Overnight Sensation DIY Speaker Kit Assembly Step by Step

$
0
0

In this post I’ll be building Paul Carmody’s Overnight Sensation DIY speakers from a kit. The Overnight Sensations are an extremely popular DIY bookshelf speaker for a few different reasons. One, cost; they are a mere $120-140 a pair at the time of this writing. Two, they sound great. It’s hard for me to recall hearing such dynamic sound from a diminutively sized form factor. Three, the build is super easy. If you have some basic tools and know how to solder, you’re all set. This post is going to be written for a beginner in mind, so if you are already experienced feel free to skip along.

There are three places I know of to get a kit. Partsexpress which includes the full kit with wood panel flatpack and accessories, MeniscusAudio which does not include the flatpack but comes with tweeters with screw-in frames, which I feel is preferable should one need to replace them down the line, and DIY Sound Group, which appears to have a similar kit to Partsexpress.

A typical Overnight Sensation kit

What will you need besides the kits? Each one is a little different, so pay attention to the parts list, but you will likely also need a set of binding posts, 5/8” black wood screws, sandpaper, wood glue, wood filler, and solder. Optionally, you will also want sealing caulk, polyfill or similar solution, and either paint or staining supplies depending on how you’d like to finish the speaker. Tools you will need include bar clamps (or trigger clamps), soldering iron, electric sander, and a power drill.

If you don’t already own clamps, they are going to be a bit of an investment. You ideally need 6 or so and they run about $15 each, so potentially check with a friend to borrow a set if that’s a problem. If you decide to buy a set, get a couple that are longer than you need as well so they’ll be around when you go to make a bigger speaker later 😉  

If you purchase a unit with a flat pack, the wood will be trimmed for easy assembly. You will simply add wood glue between the joints, clamp the enclosure together, and wipe away any excess wood glue with a wet paper towel. Ideally you will leave one side open so you can finalize the internals before sealing it up. Some people also prefer to only screw-in the rear panel with a few modifications, that way you can get in there later if need be. If you follow this route, be sure to find a good solution to seal the edges so only the port is allowing air out of the chamber. Some people also like to mount the crossovers outside so they can modify them later. If that floats your boat, the world is your oyster.


For my assembly, I found a set of crossover PCBs on eBay which I believe are made by DIYSoundGroup. They are very reasonable, and I highly recommend them as they make things so much faster and easier than drawing out the arrangement from the schematic, figuring out a good layout, gluing the parts in place and then wiring everything point to point. 

PCB Crossover for Overnight Sensations

Populated Crossover

That being said, there is absolutely nothing wrong with going that way, and you have more freedom to use larger caps if desired. Some will also say point to point sounds better than going through PCB traces, but that subject is better left for squabbling on audio forums somewhere.   

For my build I chose to assemble the crossover first and mount the PCB on the bottom panel. The Dayton caps are solid and work perfectly well here. I prefer Mills wirewound over sandcast resistors, they're worth the extra if you can swing it, and I had a pair of surplus Mundorf capacitors for the 0.22uF position, but sticking with all Dayton caps is fine too. This is a budget build so you won't get too much yield from bumping up the parts quality. The interior of the other panels is adorned with Dynamat-like sheets for internal damping. There are plenty of brands out there at different price points, but try to get thicker ones for the purpose of adding mass. I personally like to use a staple gun to really keep the sheets on there. Not necessary, but low cost insurance they won't move. It’s important to not completely cover the panels as wood glue, then later caulk will be used to ensure all the corners of the cabinets are sealed. 

Once the panels are all prepped, then they can be glued and clamped. The low-cost Titebond wood glue in the red and clear bottle works well and is inexpensive. For clamps, generally I like to leave them on overnight while the wood glue completely dries, however with most brands you can disassemble after about a half hour or so, so long as you aren’t putting any pressure on the panels.

The more clamps the better!


I left off the front baffle so I could get my hands in for the removal of excess glue and caulking of the corners. The binding posts I’m using are Partsexpress’ gold heavy duty ones along with the nice-looking mounting plates. Normally I use Cardas copper billet posts however this is a more affordable build, so I wanted to keep it that way. Most binding posts are gold plated brass so will sound pretty similar; however, you don’t want anything flimsy that will fail overtime or loosen up inside as once the speaker is sealed. Once it is, you’ll have trouble getting back in there to fix anything.

Partsexpress Heavy Posts

Partsexpress binding posts
Measure before drilling as the plate takes up some real-estate.

Also, while the speaker is still open, I ran wiring from the PCB to the areas where the drivers and binding posts will be. Again, it’s important to get the lengths and connections right as it will be difficult to access later. You don’t need thick wire as the lengths are going to be short so the resistance is minimal. I used 19 gauge for the tweeter and 16 gauge for the woofer and binding posts.


Wires running from the PCB

Note placement of damping sheets


When everything is ready inside, the front baffle can be glued and clamped in place. 


Once dry, now is a good time to sand where the panels meet to ensure the transitions are smooth. Start with rougher grade sandpaper (60-80 grit) and working your way up. Using finer than 100 grit can sometimes cause issues with this type of wood taking stain, so consult the kit manufacturer if you are staining the wood. There will be small gaps in some cases where the wood touches. This is fine and can be fixed by using wood filler. There are plenty of varieties out there like Elmer’s, Minwax, DAP, etc. and all work well, but if you are staining, you will want a stainable filler.

Sanded down after filler has been added to gaps


Given I hardly have time for personal projects these days, getting the finish done quickly is a major boon. I like to use a product called Duratex from Acry-tech. This is a paint that’s similar to truck bed liner and covers up any surface imperfections with a texture. It dries quickly (about 3 hours) and provides a durable finish. Two to three coats are all that is needed and there is no sanding required between coats. Because these speakers will be in my workroom, there isn’t much point in giving the speakers a museum grade finish, but the Duratex looks nice and is very serviceable. You can either buy Duratex from Partsexpress or directly. Custom colors are available direct, like this nice bright orange.     

Speakers with a few layers of orange Duratex coating

If you’d like to add internal fill, now is the time to do it. I used two handfuls of fluffed Acoustastuf per speaker. The drivers can now be soldered in and placed. The HiVi mid-drivers come with foam surrounds that stick in place, be sure to use these for a good seal. The tweeters will require a little bit of effort to do right and should be handled carefully. First, if any paint or stain ended up in the cavity for the tweeter, you may need to lightly sand to ensure clearance as the fit is very tight. The tweeters do not include a foam surround so a very thin layer of caulk should be placed between them and the wood cabinet to create a seal. On the back the binding posts can be soldered and the plate can be drilled in place.

Drivers soldered in place


Finally, we can plug them in and have a listen. Most speakers have a little bit of burn-in time where the drivers settle in. This is highly dependent on the driver. I found the Overnight Sensations didn’t need much time at all to sound great. The sound is fun and large, full, and on the warm side, but there is a good amount of detail. Given the cost, these are insanely good. Despite a sensitivity rating of 83/dB, they are sensitive enough to get quite loud with my Dynaco ST-35 running in either 17.5 watts per channel push-pull or ~9 watts triode mode in a smallish room.

At the end of the day, there are plenty of great sounding speaker kits out there, and many will sound better than the Overnight Sensations, however I think the price-to-performance ratio and ease of the build makes them a tremendous introduction to first time speaker builders who are looking to get their feet wet in the space. If you’re looking to add some handmade speaker cables, try out some silver-plated PTFE surplus wire, it’s a nice value. 

As always, thanks very much for checking out the blog. If you are looking for custom audio cables, headphone cables, and line or headphone switchers, please check out Zynsonix.com. Until next time!


Emotiva BasX A-100 Stereo Flex Amplifier Review

$
0
0

This is a review of the headphone output of the Emotiva BasX A-100 Stereo Flex Amplifier. If you’re not familiar, Emotiva makes some great audio products at incredibly attractive price-points. They offer a host of speakers, headphones, amplifiers, processors, and other gear. I have owned their portable DACs which are a tremendous value; I ended up parting ways for lack of need. They were quite good sounding though and offered a robust build quality. I currently have some of their power equipment which is also well built. If I were a home theater afficionado, I’d likely have even more of their gear.

Emotiva has a value-oriented 2 channel amp called the BasX A-100. Normally it is a speaker amp providing 50 watts per channel into 8 Ohms and 80 Watts per channel into 4 Ohms, which is plenty for most setups. What is also pleasing for those with limited in-house real-estate is that the unit is half width, so 8-1/2” wide x 3.125” high x 15” deep. That saves half of your shelf for another piece of equipment/some headphones or something else.

Perhaps what is most interesting about the A-100 is that it can be used as a high-powered headphone amp. Granted, very few people would need this capability, but it is there. The unit does need to be internally jumpered for this operation as it is unsafe for standard headphones. The output is:

8 Ohms:  50 watts / channel
33 Ohms:  12 watts / channel
47 Ohms:  8.5 watts / channel
150 Ohms:  2.6 watts / channel
300 Ohms:  1.3 watts / channel
600 Ohms:  0.6 watts / channel

So, what headphone owners would be interested in this feature? Owners of low-sensitivity headphones like the HiFiMan Susvara, HiFiMan HE-6 or HE-6se, the HEDDPhones, the Abyss AB-1266, and others.

Normally I use an external box with some high quality resistors to convert a speaker amp’s output for headphones (it has some protections built in for amps with output transformers) but given the low cost of the A-100, it was a no-brainer to at least try it out.

Starting with the good news, the A-100 produced plenty of usable volume with the HE-6se and drove them with spades. There are some caveats though. The first, I noticed the amp takes a bit of time to warm up. When listening immediately, the midrange wasn’t well defined. After 10-15 minutes this seems to go away. Second, I found the sound to be fairly cool/bright and slightly lacking on the low end. This isn’t a big deal if you don’t mind EQing. I found reducing the upper midrange and increasing the low range to help make the sound more agreeable for my personal preferences. If you are listening from a computer, you can use the free program PEACE to make adjustments, if not, you can pick up something like the JDS Labs Subjective3 or the Schiit Loki. Neither of these offer an ideal level of control to get the A-100 exactly right (for me), but they are well made and get the job done affordably.


Running the HifiMan HE-6se with the Emotiva A-100


It seems that perhaps the weakest link of the A-100 is its potentiometer (volume control). Early into turning it, there was very noticeable channel imbalance. This seemed to subside quickly as the volume rose; however, it is important to note. A good potentiometer can be costly, so this was likely a price point issue. Given an Alps Blue Velvet (RK27), a frequently used entry-level potentiometer for audio, is around $12 per piece in bulk, it would be very hard to implement at this price level.

You get a lot for your money in terms of parts and build


Overall, the Emotiva BasX A-100 Stereo Flex Amplifier is impressive at its price point given the heft, solid and attractive build, and ability to send 50 WPC to a pair of headphones. Also the internal rectified power supply (no wall wart) is typically reserved for more expensive gear. If you were in the position to have purchased some HiFiMan HE-6 or HE-6se and had very little left over for a suitable amp, this is probably the only game in town, aside from potentially the balanced output of the Schiit Magnius which I haven’t yet tested.

If you were only interested in powering speakers and don’t mind purchasing used gear, you might want to cross-shop an older receiver from a reputable brand like Yamaha, Onkyo, Outlaw, or Denon. If you are DIY-minded, a chip amp like Akitika is a good route to investigate for speakers.   

If you are trying to power low-sensitivity headphones via a speaker amplifier, please check out the CBOX at Zynsonix.com. It provides a safe consistent load for your amplifier while delivering the juice your headphones need. 

The MOD Rock Bottom Guitar Effects Pedal

$
0
0

Today's post is a guest post from my bud Ryan Price and covers the MOD Rock Bottom Pedal. Ryan's been getting his feet wet in the DIY audio scene and doesn't shy away from some classic point-to-point wiring.


Please excuse the possible lack of common decorum for a post.  This is my first one and it’s a learning process.  I picked up a DIY guitar pedal build kit by MOD from Amplified parts.  I chose the Rock Bottom pedal for a few reasons.  First is I wanted an analog Fuzz.  Second is the extended low end so I can use it with both bass and guitar.  the “3” rating seemed like a challenge for a pedal build novice with some soldering experience.  Considering that I have plenty of time to kill as I’m currently recovering from a recent heart transplant, I went for it even if it was gonna be just outside my skill set so far.  I was able to finish it over the course of about 4-6 hours over a few nights. 

The Pedal Kit


Now for the breakdown.  The MOD kit comes with everything you need minus tools and solder.  I used a Hakko 888D soldering iron but for this application most would suffice I believe.  Hand tools I used were a MusicNomad guitar multitool, strippers, dikes, hemostats, and some modified pliers.  I put a bit of shrink tube around the jaws so as not to damage wire and components.  While the kit comes with everything you need the wire is not easy to work with if you don’t have a solder pot.  I own one but did not have access to it at the time of the build.  I substituted the wire with some I had left over from a previous project.  Its if a smaller gauge but of much higher quality.  That’s the only substitution I made. 


Tools of the Trade


The build is rather straightforward.  Starting with terminal strips, switches, and connectors.  The layout is very straight forward and with some planning can be a super clean build.  


Classic Turret Strips


Next they have you measure out the wire.  As I followed the directions closely up to this point I found the lengths a bit on the long side (editors note: you can make the wires shorter depending on your OCD level). But I can see why as its easy to trim to size.  Not so easy to add length!  Now I got ahead of myself and terminated both ends of the runs as I was building.  For my next build I plan to take things a bit slower.  Before terminating any connection I will dry fit all components, bend and run, then get a plan of how to go forward.  The directions are decent there are a few times you run into overlapping components. 


Wired Up


Component layout is definitely the most difficult part of the build and you should take your time.  Plan ahead and follow the directions.  That will make this build a breeze.  Don’t get ahead of yourself and begin terminating at a whim like I did as you will regret it.  It will also take more time than doing a layout before assembly.  Trust me on that one!  


All Parts Installed

Once I fixed all my errors (there were many) it came together nicely. Powered right up and gave me sweet, sweet two transistor Fuzz! This pedal is a massive bang for your buck win. I can recommend it 100% to all but the most novice of DIY people. I can’t wait to build another MOD pedal in the near future. Amplified Parts has a great selection of all related components and tools (Editors note: if you're a knob snob they have a nice selection). As well as super solid shipping. I can’t recommend them enough.


Finished Up

So if you’re got some soldering skills, desire to DIY, and a few hours I say go for it!  


I left the sticker off.  My wife is an artist and I’m going to have her paint and label the pedal!


(Editors note: we'll update the story when Ryan and his wife are all done.)


Headphone and Speaker Switchboxes for HiFiMan Susvara

$
0
0

I wanted to show a few different solutions for headphone and speaker switchboxes for the HiFiMan Susvara headphones. Everyone knows these are basically the least sensitive headphones on the market so they need to be powered with a speaker amp to sound their best. Speaker amps weren't really made to power 60 ohm headphones, so it's nice to keep them happy with a load closer to what they were designed to output. Also, if you are using multiple amps or one amp for both headphone and speaker duty, it can be pretty annoying to have to get behind your equipment and swap the spades or bananas every time you need to switch. Thus the need for high quality switches that won't degrade the signal. 


First use case is a gentleman who likes very minimalist looking equipment, thus the limited printed letters on the front. He wanted to be able to use one amp and switch between his Susvaras and his speakers, so simple single switch operation. The headphone outputs are for low sensitivity (Susvaras or HE-6) and high sensitivity for regular headphones. 

This chassis has a 10mm front panel and 2mm for everything else so it has a nice weight to it. This is good for those of you with thick speaker cables. 10mm really has to be machined/milled, most panel mounted parts aren't compatible. In this case we milled so the 4 pin XLRs could be flush mount, and the switch needed some inletting from the back. On the back we have the splendid Cardas CCGS binding posts which are milled copper block covered in gold and rhodium. They're my personal favorite; pricey but you get what you pay for. It also has nice thick aluminum feet with ring dampers but they are hiding underneath. Inside is hand-sleeved high purity soft drawn silver. 


Next we have a slightly more budget oriented build that will allow the user to select one of two amps to either power a pair of speakers or the Susvara headphones. It also has a subwoofer output and an RCA is on the back so the user can ground the chassis to a grounding system if desired.

Engraved brass plates provide identification for the inputs/outputs and functions. This unit utilizes a set of EAR isolation feet.


This one isn't necessarily for a Susvara but it allows the user to select between 3 balanced headphone amps and 4 balanced headphones. It features nice Grayhill switches and hand-sleeved high purity soft-drawn silver. The knobs are milled aluminum. The 3 inputs are on the back of the unit. Remember to turn down the amplifiers before switching for two reasons, one tube amps need a load, and two, you could inadvertently switch to a higher sensitivity headphone and the high volume could harm it. 


I make a lot of these types of projects but these I found to be some of the more interesting ones. As always you can order a speaker amp to headphone converter that can switch between low and high sensitivity modes, and can switch between 4 pin and 1/4" outputs. This one has a speakON connector for use with a Benchmark AHB2 Amplifier. The Benchmark is a popular choice to use with the Susvaras.


I hope you enjoyed this little gallery. If you need a custom high-end headphone or speaker switcher you know where to find me :) 

If you are trying to power low-sensitivity headphones via a speaker amplifier, please check out the CBOX at Zynsonix.com. It provides a safe consistent load for your amplifier while delivering the juice your headphones need. 


High-end Custom Audiophile Headphone Cable for HiFiMan Susvaras

$
0
0

High-end Custom Audiophile Headphone Cable for HiFiMan Susvaras

If you are looking for high-end audiophile wire, ultra pure ohno cast copper, aka UP-OCC, should be on your shortlist. The copper is drawn from much larger crystals so it has a much smoother and cleaner appearance under a microscope versus standard oxygen free copper with a more grainy texture. See below: 


Thanks to it's long grain structure, UP-OCC is commonly used for higher-end audiophile cables. But what if we wanted something even better? Zynsonix now has access to ultra pure, ohno cast silver (UP-OCS) wire known for even better conductivity. 

For this post I'll be assembling a Zynsonix UP-OCS Centurian Octet headphone cable for the HiFiMan Susvaras, easily one of the best headphones on the market. The Susvara's are known to be very unsensitive so that's why the Octet formation is recommended to get the extra juice from your headphone amp or speaker amp to the headphones. 

At the start we will need to hand-braid the UP-OCS silver wire, this is a pair of litz quads which will be running in parallel. 


I like to give the cable a nice snug PTFE Teflon wrap to help reduce unwanted vibration and microphonics. 


Next comes the sleeving. We went with ViaBlue's patterned black, red and white patterned sleeving


The next step is to add the Zynsonix blind embossed leather tag and Y-splitter.


And we can terminate the cable with some Cardas Quadeutectic solder, 3.5mm connectors and a Furutech rhodium plated 4 pin XLR for balanced audio. 


This is an extremely high performing audio cable that does the HiFiMan Susvaras justice. It's also relatively light despite the extra conductors thanks to the hand-braided UP-OCS. If you'd like to hear the best your Susvaras can sound, please check out the Zynsonix Imperial Legate. It can be terminated in any balanced or single-ended rhodium connection including 4 pin XLR, dual 3 pin XLR, 6.3mm TRS, 4.4mm TRRRS, 3.5mm TRS, 2.5mm TRRS, bananas/spades, or SpeakON connector for Benchmark AHB2.


Spirit Torino's Super Leggera Headphone Review

$
0
0

I’ve been into HiFi audiophile headphones for a couple of decades now, and the hobby today is probably the biggest it’s ever been. While headphones were invented in the late 19th century, those intended for musical reproduction got their start in the late 50s with the Koss Stereophone in 1958. Koss released numerous quality headphones for decades and remained very popular. In the early 90s, higher-end headphones were having a renaissance of sorts with Sennheiser making the groundbreaking HD580, Grado releasing their SR series, and Sony introducing stellar products like the CD3000. In the 2000s we had AKG release the K701s, Sennheiser the HD600s, Grado the metal-bodied SR-325s, and Beyerdynamic refreshing and marketing its DT series for recreational listening. Into the 2010s and the options have exploded far beyond belief with many more players in the game and brands accommodating many different tastes. One company that really stands out to me is Grado, a small family-run business operating out of New York. 

Grado (pronounced gray-doh) is what I’d consider a conservative business that hasn’t made many changes as the headphone sector has turned into a whirlwind of competition. If you look at the SR125 which was introduced in 1993, it looks nearly the same today, and I’d imagine it is still produced by hand the same way it was back then. There are the plastic grills with discs in the middle noting the model number, plastic gimbals and angled metal rods attaching them to the plastic rod-blocks marked “L” and “R” and looking inside you can see the driver and the wires running to it soldered by hand.

The Grado Hemp Headphones
There’s something very charming about small businesses making hand-made goods in this day and age where everything is becoming automated; that’s probably what I like best about Grados. They refuse to conform and continue their own path, stubbornly ignoring pleas for removable cables and more comfortable pads. It makes them polarizing, with some people dismissing them as cheap looking or antiquated compared to new planar magnetics and dynamic headphones that fully cover the ears, while others embrace their quirks and often buy more than one.

If you haven’t heard a Grado before, they have a general house sound. That would be a little light in the lowest bass, fun punchy sub bass, neutral mids and crisp, forward high energy in the upper mids and highs. As you go up the line they become more resolving and refined (generally). New additions to the stable such as the limited Hemp release and the RS-1X which incorporates hemp in the wood body are voiced a little more warmly which makes them great for longer listening sessions free of fatigue. Just about anyone who’s listened to a Grado will tell you they are great for rock music as you can really feel the energy come through the music.  

So if you try to distill what makes a Grado a Grado and you remove all the intangible brand-equity that comes with a family business making hand-made goods, you’re going to be left with the fairly unique use of rudimentary gimbals with fixed rods that are inserted into rod-blocks which are held by the headband, along with 44-50 millimeter dynamic drivers in a smaller driver cup that doesn’t fully cover the ears. 

Unique engraving options

Andrea Ricci, a fellow Grado enthusiast, started modding headphones using Beyerdynamic and Grado parts in the late 2000s. Creating a company called Spirit Torino, he began offering items for sale in 2016 including the Spirit Labs MMXVI which were Grados with custom engraved metal cups, a new headband, specially tuned SR80e drivers and a custom cable. Other headphones were to come in the following years like the Twin Pulse with isobaric motor unit. Now a full-fledged company with more mature products and distribution outside of Italy, Spirit Torino has become a headphone company that audiophiles should consider when selecting among the other high-end brands available.

While once a curiosity, I was finally able to obtain a demo pair of Spirit Torino headphones for audition. The Super Leggera, which probably resemble Grados the most out of Andrea’s offerings, are nearly all metal, from the cups, the rod-blocks, the rods, the driver grill, etc. The cups are partially anodized and have been CNC engraved. There is a generously sized suede headband with visible stitching and the pads protrude out the way a Grado G cushion would. The pads however are fenestrated suede which are probably about the size of Beyerdynamic DT series pads and look like an offering from Dekoni. The rod-blocks utilize two Allen screws, one holding the headband, and the other allowing you to set the position of the rod more permanently. The second feature is especially important given the weight of the cups, and something that would be welcome on Grado’s larger metal cupped models.


The Spirit Torino with luxurious suede headband and handy locking screws 

These features, along with the weight, come together to give a sense of quality / luxury. Another welcome feature is a removable cable, a feature that really makes far too much sense not to include. Everyone is using different single ended or balanced connectors, everyone has a different space between them and their gear, and if you have pets or are just hard on your gear the cable will likely get damaged, so an easy replacement goes a long way.  

If you like customization, you’ll be very pleased that Spirit Torino headphones come in a variety of different color cups and headbands. Plain black doesn’t get to have all the fun like usual, with vibrant reds, blues, and intricate engravings adorning some models. I get the impression that Andrea really enjoys the CNC machine as so many of the parts have been fashioned with it. I believe Grado also uses a CNC machine for cutting/engraving, however it is limited to the cups.

Beautiful CNC work everywhere you look.

So that’s all good and well, but how do they sound, and how do they stack up against Grados?

This review will be comprised of my initial audition of the Super Leggera, and after I had sent over to Andrea in Italy to have it updated to the latest revision.

My first impressions of the non-upgraded version were very good. I found I liked them best with Todd the Vinyl Junkie (TTVJ) flat pads. Sub-bass was very powerful and succinct, larger than life and probably a bit too much for those looking for a balanced headphone. There was a strong authority to entire sound range where everything was dominant and in-your-face (or ears in this case). The presentation was full, warm, and not much in the way of soundstage. The clarity of the highs is usually reduced a little bit when using the flat pads with Grados, which is also the case here, but many of us like the tradeoff. The early version Super Leggeras are definitely a fun sounding headphone with the flats, but clearly not as refined as something like a Focal Utopia.

Upon speaking with Andrea who runs Spirit Torino, he let me know that there are a couple of important updates that have been added to the units, including a “neodymium magnet enhancement of 3.8 kg” on each driver, and a “Nen Ventilarion” pad system, which may just be a bad Google translation of ventilated. After a short trip to Italy, these two changes had a profound impact on the sound, which went from Ibiza dance club to something more akin to a symphony hall and reminding me of the Grado GS presentation.

If you’re not familiar with the GS-2000e, it doesn’t have the peaky upper midrange that defines the Grado “energetic” house sound, but there is a slight peak there. There is also a pronounced sub-bass energy that seems present with nearly all Grados. The overall sound is both crisp and full. Comparing the GS-2000e ($1,399 USD MSRP) to the Super Leggera ($1,600 USD), the transition from subbass to midrange is the most stand-out change (while still being a little on the punchy). I believe adding the weight to the back of the driver assists to make the transition much smoother. Also present was a wider soundstage, while not as wide as something like the hybrid driver Enigma Acoustic Dharma headphones, there was more of a palpable space, likely created from the new ventilated / fenestrated pads. Other than that, the sound seems a little crisper when it came to guitars, but relatively similar.

You might be wondering why changing headphone pads makes such a marked difference. The sound of dynamic drivers like Grado and Spirit Torino can vary wildly depending on how close they are to your ear. As the driver gets closer to the ear, bass and fullness increase dramatically while treble clarity suffers and soundstage shrinks, and when it’s pulled away all these facets are reversed. Thus, it’s very important to get the position right. I can tell Spirit Torino went to great lengths to not impair the sound by have a very thin fabric between the ear and the driver that is barely there and having the circumaural pads (pads that cover the ears completely) get the driver at a very specific distance from the ear canal. 

Note the perforated cups and attractive CNC-cut grill

The verdict? Honestly, I liked both the original and latest version of the Super Leggera for different reasons. The original made thumping electronica and synthwave wildly exciting, and the latest version worked much better for acoustic guitar and indie rock genres I enjoy such as shoegaze and prog. Compared to the GS-2000e the latest version offers a similar sound with a little more refinement and is built so impressively it’s hard not to gawk at them before putting them on your head. At $1,600 USD I believe it is priced competitively for the sound quality, and very reasonable when you consider the build quality.

Justin of Headamp has been in the headphone hobby 20+ years now and is the U.S. distributor for Spirit Torino. I’ve met him at a few meets and he’s a great fellow. Drop him a line at Headamp.com if you’d like to check out this exciting new offering in the headphone world. 


Please note the Spirit Torino Super Leggera was provided to Zynsonix Audio LLC at a discounted rate for an honest review.

Viewing all 105 articles
Browse latest View live